Your First Uniq Factory
Make sure you're ready
Once you have your metadata set up, you'll be ready to create your first token factory.
Just to be absolutely clear, the expected flow for building a Token Factory is:
- Upload images
- Generate metadata
- Calculate hashes
- Push on-chain
Without the images already uploaded to the correct location, the metadata tool can not verify that they exist, nor can it create the unique hashes that identify them.
WARNING
It is up to you to manage the Token Factory images and ensure that they are permanently available for the network to access.
If you'd prefer to focus just on this section and learn how to push the on-chain transaction that generates the Token Factory, we have prepared a simple example zip file for you that already has been generated based on files that are located in this developer guide. You're welcome to upload this to anywhere semi-permanent for your learning purposes. We suggest Github, and you can access it as a RAW file from there.

To create a Token Factory on Testnet, you'll be using the Ultra Developer Tools. If you haven't set up your developer environment, we've set up a quick checklist for you to be able to hit the ground running.
Once you're inside your docker image, have your wallet set up, and have your Testnet account ready, you're good to go for the next step.
Creating your first Token Factory
Once you have everything set up, you'll be ready to create this Token Factory on the Testnet.
The following is an example transaction. You will have to fill in the missing details:
<YOUR ACCOUNT>- Your Testnet account<MINT WINDOW START>- A datetime in the format2021-05-31T00:00:00<TRADING WINDOW START>- A datetime in the format2021-05-31T00:00:00<YOUR UNIQ FACTORY URI>- The URI of the metadata either as a zip file, or targeting thefactory.jsonfile with a full path, values cannot be an empty string<YOUR UNIQ FACTORY HASH>- The hash of the filename, you can find this inupload.jsonin thefactoryblock at the top<YOUR DEFAULT UNIQ URI>- The URI pointing to the token metadata if there is no token-specific metadata. Must not be empty and can be either static or dynamic<YOUR DEFAULT UNIQ HASH>- The Hash of static default token URI. It is optional to provide this and it should be a SHA256 of the content of default token URI. If default token URI is dynamic - specify the hash per token instead
cleos -u http://ultratest.api.eosnation.io push action eosio.nft.ft create.b \
   '[
      {
         "memo": "CREATE UNIQ FACTORY",
         "asset_creator": "<YOUR ACCOUNT>",
         "asset_manager": "<YOUR ACCOUNT>",
         "minimum_resell_price": null,
         "resale_shares": null,
         "mintable_window_start": "<MINT WINDOW START>",
         "mintable_window_end": null,
         "trading_window_start": "<TRADING WINDOW START>",
         "trading_window_end": null,
         "recall_window_start": null,
         "recall_window_end": null,
         "max_mintable_tokens": 10,
         "lockup_time": null,
         "conditionless_receivers": null,
         "stat": 0,
         "factory_uri": "<YOUR UNIQ FACTORY URI>",
         "factory_hash": "<YOUR UNIQ FACTORY HASH>",
         "authorized_minters": [],
         "account_minting_limit": 1,
         "transfer_window_start": null,
         "transfer_window_end": null,
         "maximum_uos_payment": null,
         "default_token_uri": "<YOUR DEFAULT UNIQ URI>",
         "default_token_hash": "<YOUR DEFAULT UNIQ URI>",
         "lock_hash": null
      }
   ]' \
-p <YOUR ACCOUNT>
Once you've run this command, you should get a message confirming that your transaction has been executed locally.
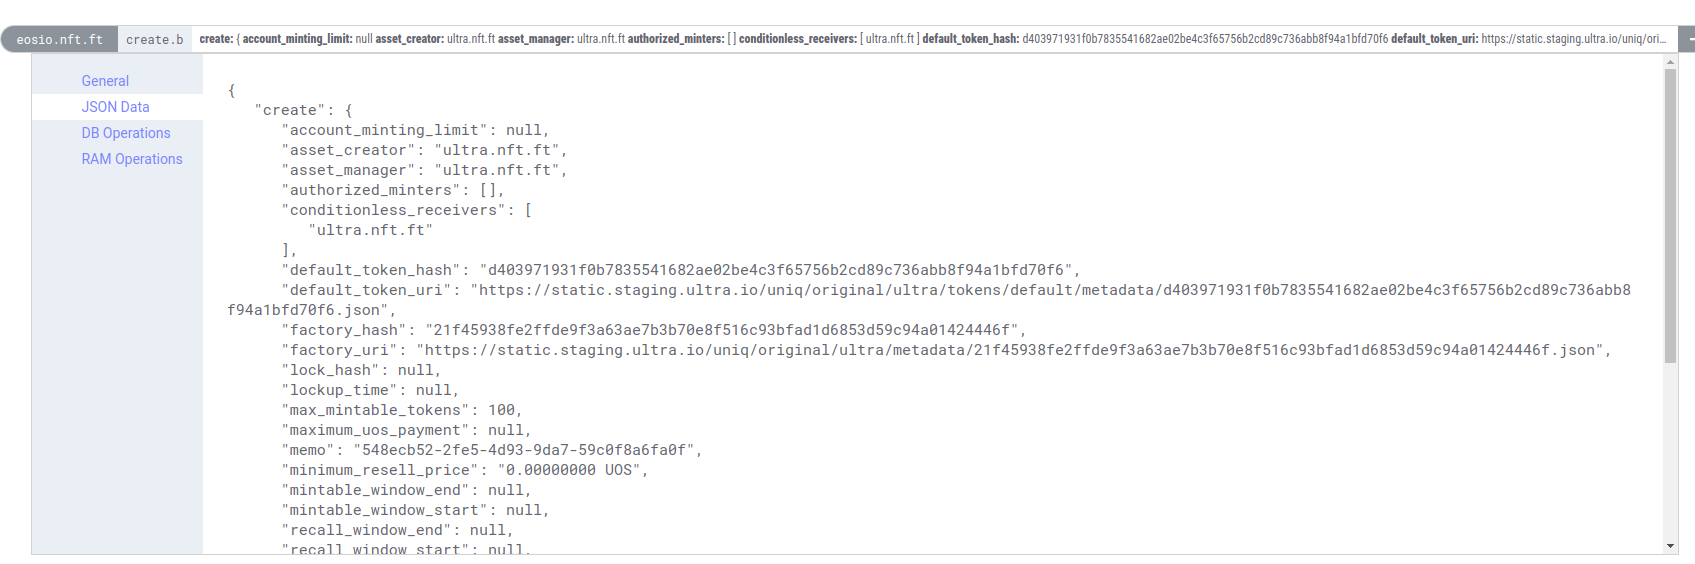
To see it in action on the Testnet, hop on over to the Testnet block explorer and input your account name into the search box at the top.
You should see a new transaction that shows that your new Token Factory has been successfully created.
We are glossing over a lot of functionality here, in the interest of getting you up and running quickly. Later guides will cover some of the more advanced features that our NFT standard supports, including variants, authorized minters, and much more.
In the meantime, congratulations on creating your first Token Factory. Now, let's go mint your first Uniq!